Facebook Integration
Introduction
- Introduction to Facebook : Facebook is a prominent social networking platform founded by Mark Zuckerberg and his college roommates in 2004. It allows users to create personal profiles, connect with friends and family, and share content such as photos, videos, and posts. Over time, Facebook has evolved into a comprehensive platform offering various features and services. Facebook has a vast global user base and has become a significant platform for social interaction, news dissemination, business marketing, and community building. It continues to evolve by introducing new features, focusing on user privacy and security, and expanding its ecosystem through acquisitions and developments.
Facebook Bot Integration
Facebook Bot integration allows businesses and developers to create interactive automated experiences within the Messenger app, making it easier to engage with customers and users on Facebook.
For this firstly, we need to register as a meta developer, to create and review the app or the integration for any brand
Creating An App
We need to create an App for managing our integration. An App can easily be create through the dashboard of meta developers page after logging in. Choose the App type to be business and simply enter an app name to create the App.
Products we need to setup for integration
For integrating facebook we need to setup three products. They are Messenger and Webhook.
Things To Be in environment variables
- FBPageAccessToken
- FBAppSecret
- FBVerificationToken
- FBPageId
- FB_BOT_STATUS
Getting Values for environment Variables
FbAppSecret - We can get this from Basic Section of App Settings
FBPageId - This is the id of the page we need our bot to work for. We can find this in the url of the page and shown in the below image. ****

FBPageAccessToken - (refer point 3 under heading Adding Your Page to the App)
FBVerificationToken - This is any unique SHA-256 key. We can generate it from the web and use it.
FB_BOT_STATUS - This variable needs always be set to true
Note
Always use the same verification token while attaching the webhook else the webhook will not be verified.
Attaching Your Webhook to the App
In this step we attach the Url or the route where we would want the app we created to send requests to. Before Attaching the webhook we need to ensure we have all environment variables present in our project as once we attach a webhook, meta sends a validation request to our project from where we need to acknowlege the request with status code 200. If we do not acknowlege the validation request sent we would not be able to attach the webhook. Follow the below steps to attach a webhook
- Click on webhook product that we setup in the previously and change the type to “page†and click on “Subscribe to this objectâ€.
- A dilogue box will open up asking for the webhook url and verify token.Enter your webhook url and create any SHA-256 encripted token which would be the same as FBVerificationToken of environment variables of the project.
- Now, Click Verify and save. Make sure your webhook url is listening to requests otherwise the verification would fail.
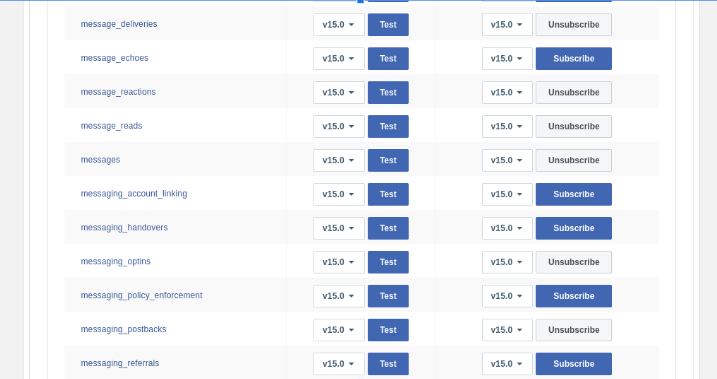
- After attaching the webhook, we will have to subscribe to these 6 events for which our ORI ocs would be listening and do handling for.
APP Roles
There are mainly 3 roles that we will be learning on and is of importance here.
- Administrators - Administrators have complete access to an app. They can grant the app any permission while it is in Development mode, and all features are active for Admins while it is in Development, They can change all app settings, reset the app secret, remove the app, and view Credits and Insights. Administrators can also assign and remove roles to people and change the permissions of others. Administrators of apps should only add other people as administrators if they are fully trusted and must have full control of the app.
- Developers - Developers can grant the app any permission while it is in Development mode and all features are active for Developers while it is in Development mode. They have access to the app and all its technical settings that are needed to run, edit, and test the app. Developers can modify all technical settings through the App Dashboard. They can also see insights for the app.
- Testers - Testers are the ones who can message on the bot on facebook during its development phase and for only these test users the bot will respond not for any other user in any other role.Testers can grant the app any permission while it is in development mode, and all features are active for Testers while it is in Development mode. They cannot edit any app settings, give other people access to the app or access insights for the app. You may only add a person as a Tester to your app if they are your employee or you have an agreement with them which establishes that they are acting on your behalf as a tester of your app. For example, a Tester should be a part of your quality assurance team and be responsible for testing your app for bugs, errors or other issues that could have a negative influence on its general performance. If a person is no longer testing your app, you should remove them from this role.
Adding Your Page to the App
Follow the steps to add the page to the app
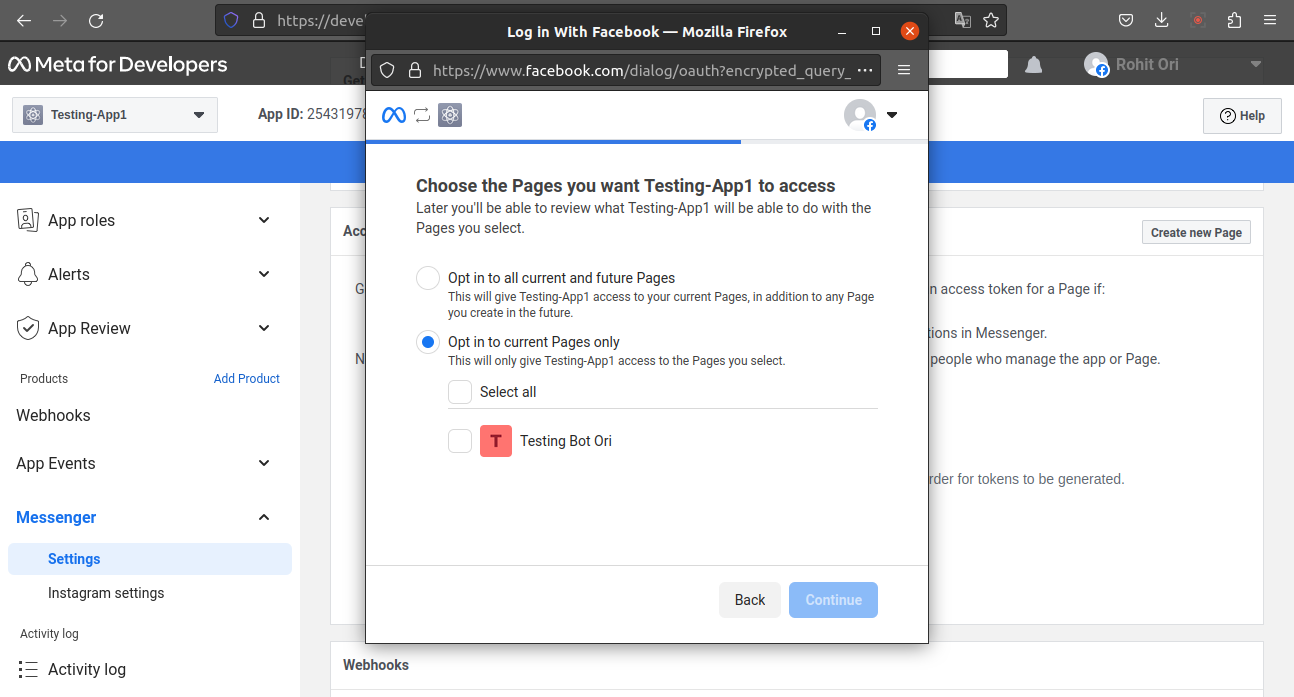
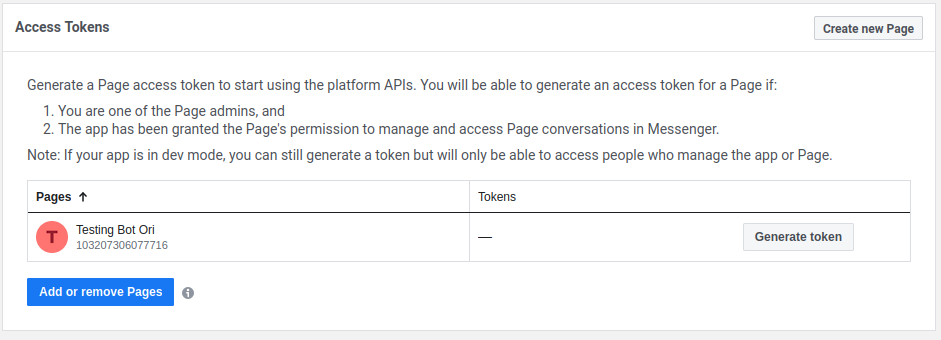
- Firstly, get the page id and in the app goto the settings of the messenger product. Then click on add or remove pages.
- Now, choose the pages you want your app to have access for. Please Note that here we can only those pages that have been created with the same facebook account. In the image below we had Testing Bot Ori Page created with same facebook account. This is a step where we need the client to add there page to the App we make them create.
- After the page is attached we can the FbPageAccessToken by clicking on the generate token.
Facebook Route in Code
Entry Point of request: app.js

Router File to handle routes: non_npm_modules > botly > lib > Botly.js
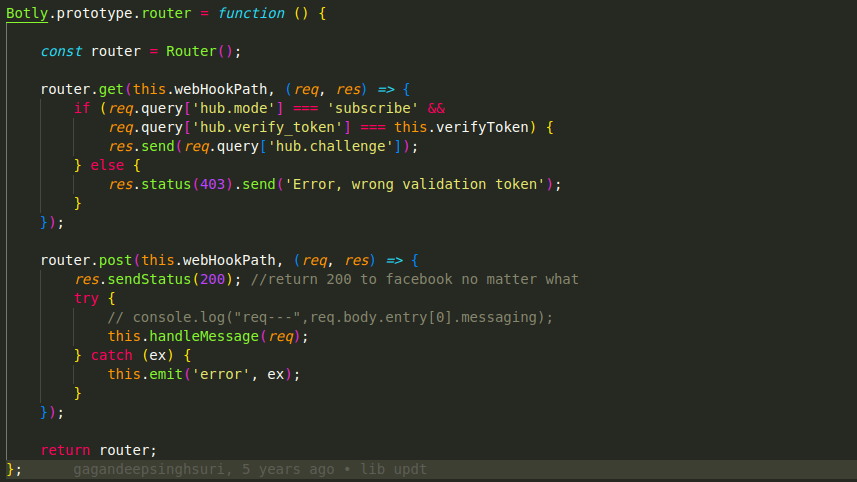
In this function as we can see the first get route is used for validation the webhook when we attach it on the dashboard.
Send Message using POSTMAN
curl --location 'https://graph.facebook.com/v2.6/me/messages?access_token=EAANTWZBx3T7kBAEPQmZBGYpawr6AeRJRyH1ZAZCWZAXg6OVbJv7Uw1sMeA7R7tnjkihtyZAJeJmsWpfEEDiL7DPRZBZBZCYVi4AyD7Yi9QzQDQWJgJl68zWG4Liykai6aUlMAcuWGIfBJBv2YJDex0suXjUX1bNoOSa8UAzbRLoqmDG94kXZB8je08' \
--header 'Content-Type: application/json' \
--data '{
  "recipient":{
    "id":"5963325443702911"
  },
  "message":{
    "text":"Testing using postman"
  }
}'
Just paste the access_token from the app that we get when we connect the facebook page to our app and change the recipient id as the page id for the page on which you want to send the message.
App Review
- Make sure the app is in Development mode or is a Business app type.
- We need to make a recording while testing our app, so make sure it demonstrates actions that require the permissions and features we are requesting. Any requested permission or feature missing a screen recording will not be approved.
- For the link here to follow the steps and instructions that we need to make sure while recording the video.
- Once you have submitted an App Review request, you will receive periodic developer notifications informing you of your submission status. These alerts will appear in the Alert > Inbox panel. You can also check your submission status using the App Review > Requests panel.
NOTE: It typically takes us less than one week to process your submission, and often takes only 2–3 days, but may take longer during peak periods. Please follow this link for all the things you need to make sure before you submit the app for review.
Follow this document for the complete detailed information regarding facebook integration